Webinars have a reputation.
A profitable reputation.
76% of buyers attend to help make purchasing decisions, and paid webinars on ClickMeeting generated $366,000 in 2020 alone.
But to cash in on this opportunity, you need to know how to promote your event.
That begins with using Facebook Events to your advantage.
With 2.95 billion monthly active users, Facebook is the best platform to gain exposure and reach your target audience.
Below, you’ll find a step-by-step tutorial for setting up your first Facebook Event, as well as tips for maximizing your reach and stopping users mid-scroll to sign up for your webinar.
Ready to start growing your online presence and making money from your knowledge?
Let’s go!
How to Create an Online Facebook Event (Step-By-Step)
Before learning how to promote your webinar, you need to learn how to create Facebook Events.
Step 1: Log Into Your Facebook Page
You’ll need to log into a personal Facebook profile that has admin access to your Facebook page.
Step 2: Select the Events Tab
Navigate to your page and select the “More” tab. Then select “Events” from the drop-down list.

Step 3: Create an Event
Select the “Create Event” button on the right-hand side of the page. In the new pop-up window, fill in the following information:
• Add a cover image
• Event name, date and time
• Select virtual event
• Choose how to host the event (Messenger rooms, Facebook Live, external link, etc).
• Select your privacy setting (private or public event)
• Write a description for your event
• Select your market category (social issues, parties, professional networking, etc).
• Add your co-hosts
• Adjust your communication settings
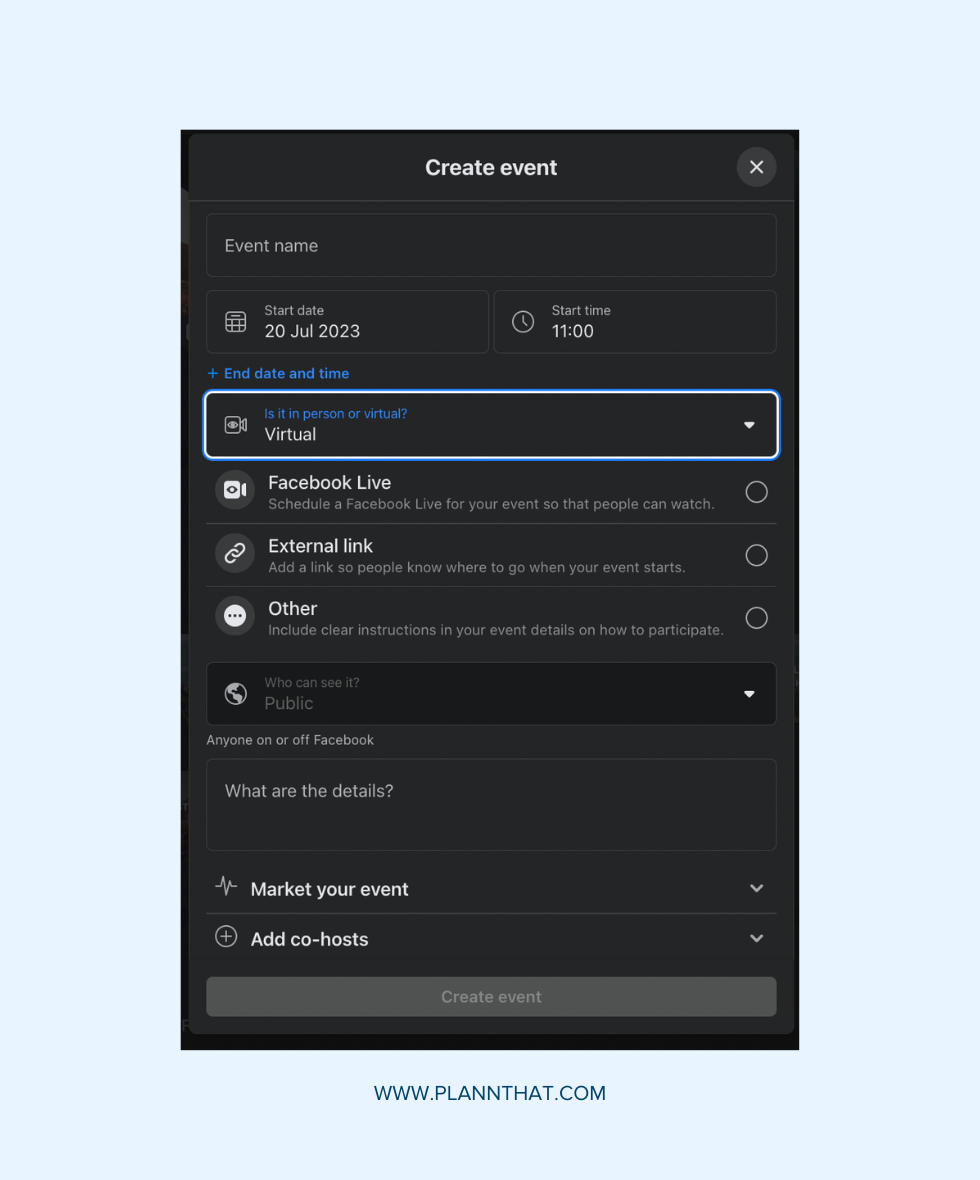
Once you’re happy, select “Create Event”, and you’re done!
…Well, almost.
The next item on your to-do list is inviting guests and promoting your event on social media.
How to Use Facebook Events to Maximize Your Reach
Generic Facebook Events aren’t going to cut it.
If you want to stand out from the masses, you need to cut through the noise and make sure your webinar is speaking to a specific group of people.
With a clear persona in mind, all of the below steps fall into place and help promote your Facebook event like clockwork.
Choose Enticing Facebook Event Names
Here’s the deal.
If you want to boost signups for your webinar, you need to use a more enticing event name than “digital marketing webinar”.
Sure, it gives you the event’s topic, but it doesn’t compel you to join. There’s no emotional reaction to make the viewer feel “I cannot miss this”.
How do you create that response?
With basic copywriting 101:
• Get specific.
• Grab attention.
• Keep it short.
Think about the audience you’re targeting, the problem you solve, and the outcome your guests will receive.
Let’s look at an example.
Instead of using a basic event name like “networking strategy”, try something like “30-minute networking strategy masterclass”.
Why does this work?
You’re enticing signups with a minimal time investment and advertising the outcome. Attendees will know right away what they’ll learn from your online event.
Use an Eye-Catching Cover Image With Text Overlay
Next, you want to ensure you’re using a high-quality cover image.
The ideal Facebook event photo size is 1920 x 1005 pixels.
Anything smaller will pixelate and won’t look great on different screen sizes.
…But here’s the kicker.
Uploading a scenic photo of the beach is okay, but it won’t grab people’s attention.
Remember, most users are scrolling mindlessly through Facebook. You want to create a cover image that will stop your target audience mid-scroll.
The solution?
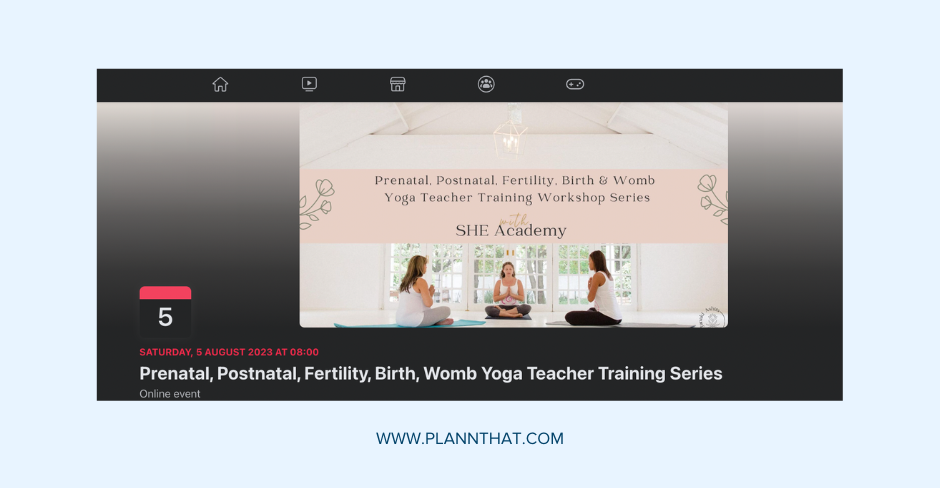
Add text overlay with Canva and use a call-to-action.
For example, if you’re promoting a festival, you’ll want to reiterate the time, location, and other enticing information, like headlining acts.
The same applies to online events:
• Add your event title to the cover image so it’s clear who it’s for.
• Add scarcity or FOMO (e.g. only ten spots available).
• Use bold, clear, easy-to-read fonts.
Add Your Agenda to the Event Details Section
The event details section is your opportunity to seal the deal.
You’ve caught the person’s attention with your webinar name. Now you need to give people a reason to attend and answer basic questions like:
• How guests can attend
• How much is it?
• What will attendees learn?
• Are there any freebies for showing up?
• Will there be replays?
• Is there a limited amount of signups?
The most important thing to add to this section is FOMO (fear of missing out). Incentive your guests to come and drive home what will happen if they don’t attend.
Here are some ways you can add FOMO to your webinar:
• Collab with big names in your industry
• Giveaway exclusive prizes
• Offer a downloadable freebie
• Highlight the results guests can expect from your teachings
• Add testimonials from past event attendees
Promote Your Webinar With Facebook Ads
Planning a webinar is no easy feat.
Luckily, Facebook Ads make it easier and help you reach your target audience faster.
Once you’ve created your event, you’ll see a “Boost Event” button on the public Facebook event page.
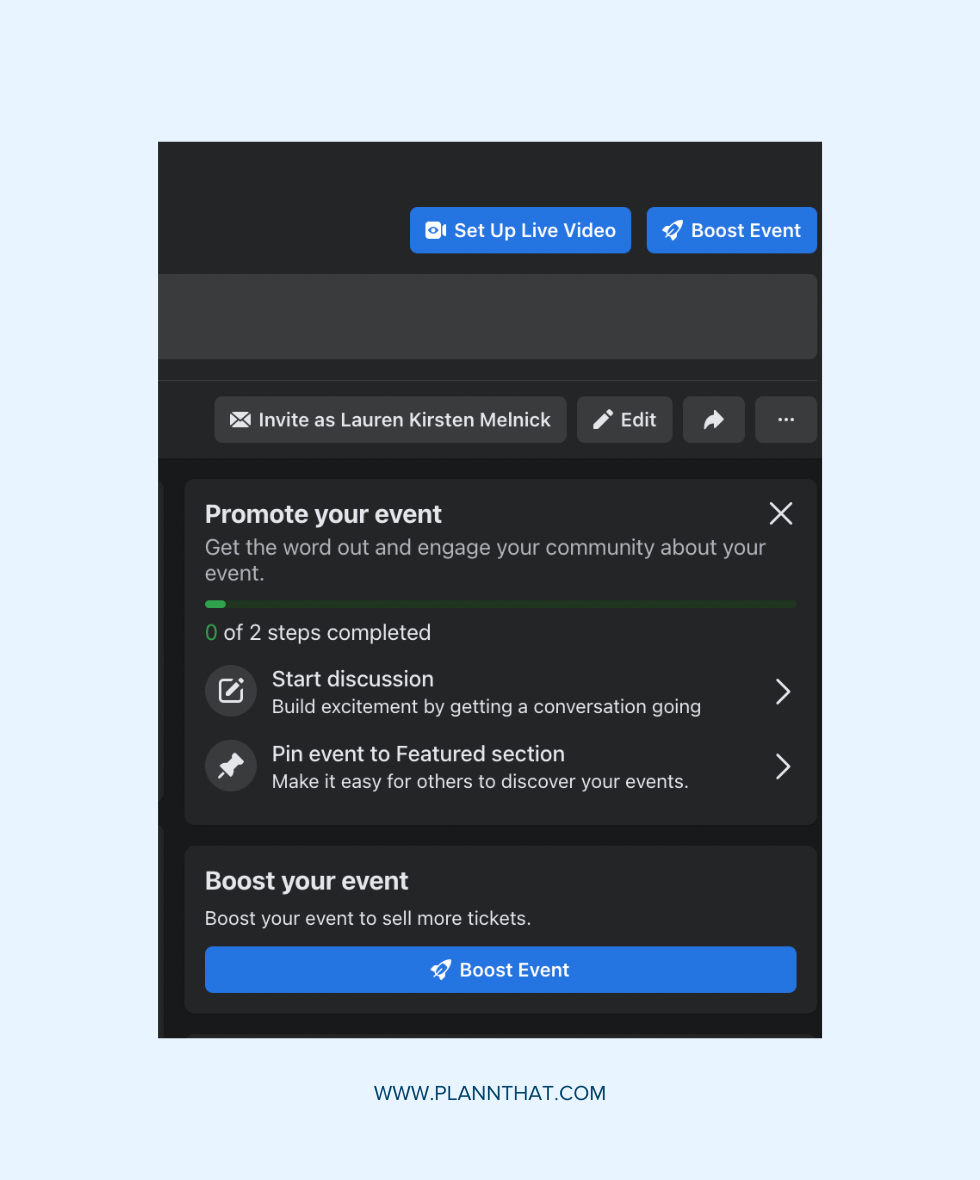
Click on it, and you can access various tools to help you fine-tune your ad.
• Optimize your ad creative.
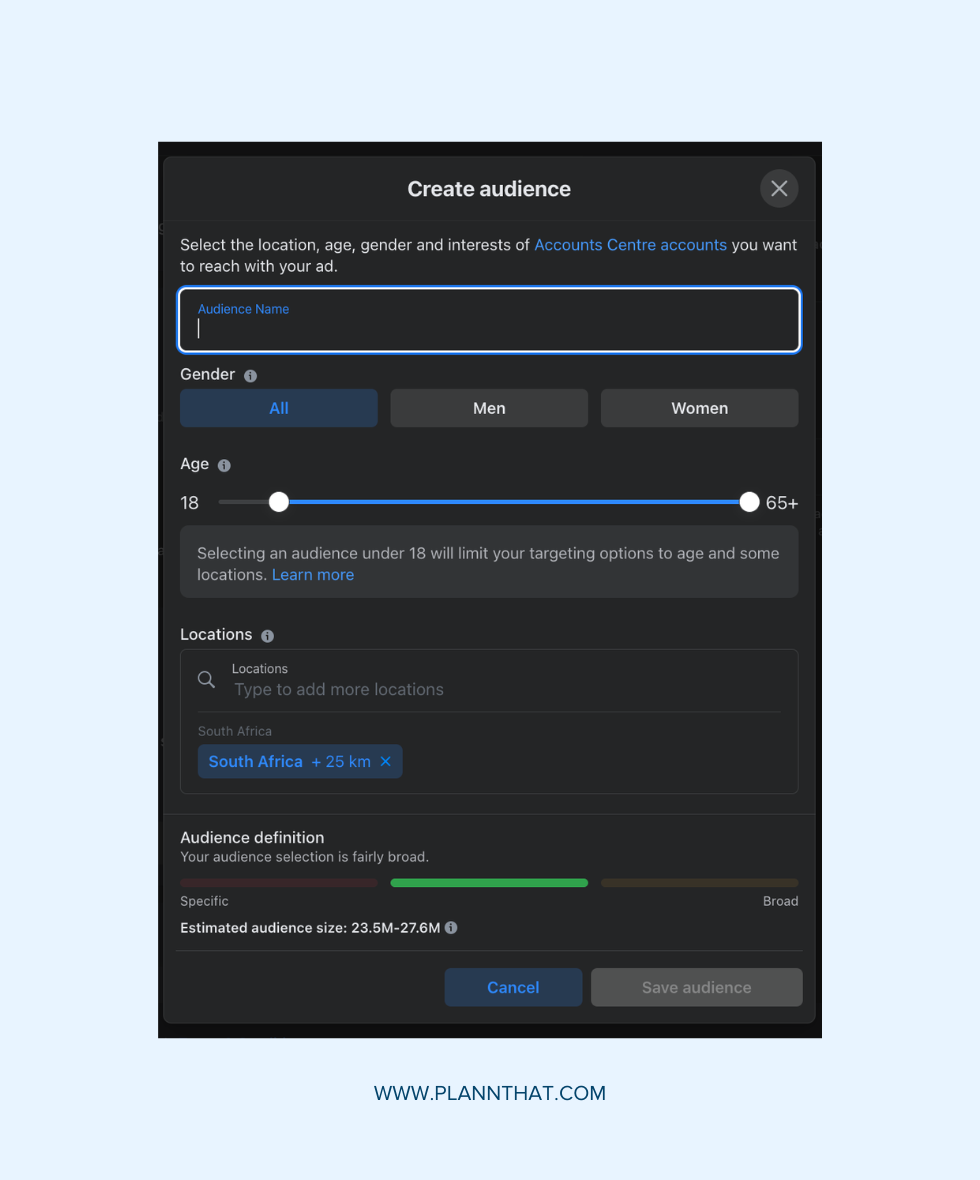
• Select your audience (Build look-a-like audiences, target people who like your page, or create custom audiences).
• Select your duration and budget.
• Add a Meta pixel.
• Top up your Facebook Ads balance.
Drum Up Interest for Your Upcoming Events With Plann
Got your event page up?
Great!
Promoting it outside of Facebook is the last step in maximizing your event responses.
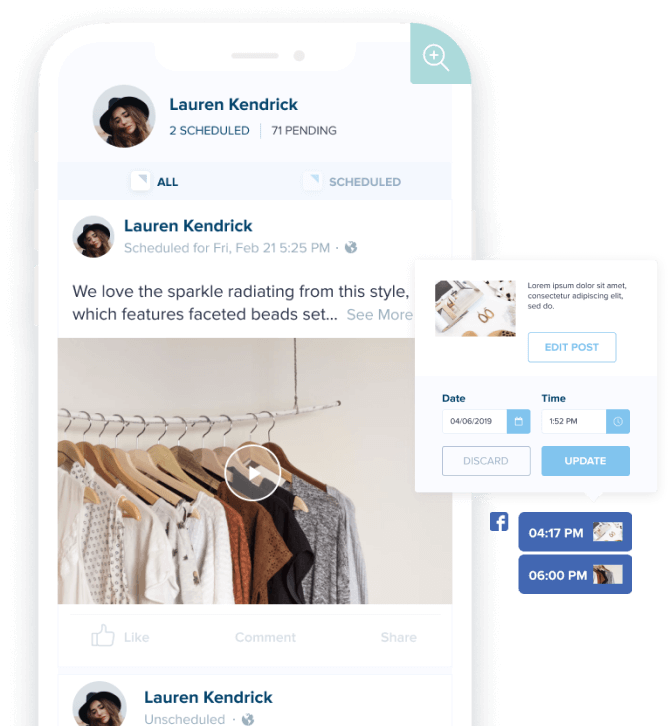
Sign up for you a 7-day free trial of Plann Pro today, and schedule posts about your webinar on other social media platforms like Instagram and LinkedIn.
With our built-in cross-promote feature, you can quickly re-create posts, tweak the copy for each audience, and send it out at the optimal time for peak engagement.
