To stand out on social media, you’ve got to pique your viewer’s interest from the very first second of your videos – and a foolproof way to do that is by stepping up your editing techniques with Instagram Reels transitions.
Whether you create transitions yourself using pro filming and editing techniques, or you entrust a powerful video editing app to do it automatically, transitions are bound to lift your Instagram Reels game.
Not sure how to use Instagram Reels transitions to your advantage for captivating video content? We’ve got you covered – keep reading for our how-to guide and some on-trend transitions to try the next time you’re editing a Reel.
Why should you add transitions to Reels?
Capture user attention
The biggest benefit of using Reels transitions is capturing user attention quickly. Studies show our attention spans are waning, and creators now have just three seconds to convince viewers to stick around. By using transitions, you’ll add flair to your Instagram videos and keep viewers stimulated.
Give your content a professional edge
Best-of-the-best creators are all about the IG Reel transitions, whether they’re created using fun filming techniques, or are simply added to a video editing program. If you’re looking to level up your videos, transitions will make them appear slick and professional.
Hit the Explore page
Every creator seeking growth wants their content to land on the Explore page. Give yourself the best chance at hitting Explore (and seeing an uptick in engagement after the fact) by making your video more captivating with Instagram Reels transitions!
The best editing tools for creating Instagram Reels transitions
There are plenty of editing tools around that make adding transitions to Instagram Reels easy and fast. Let’s explore three of our favorites.
Instagram Reels Editing Tool 1. CapCut
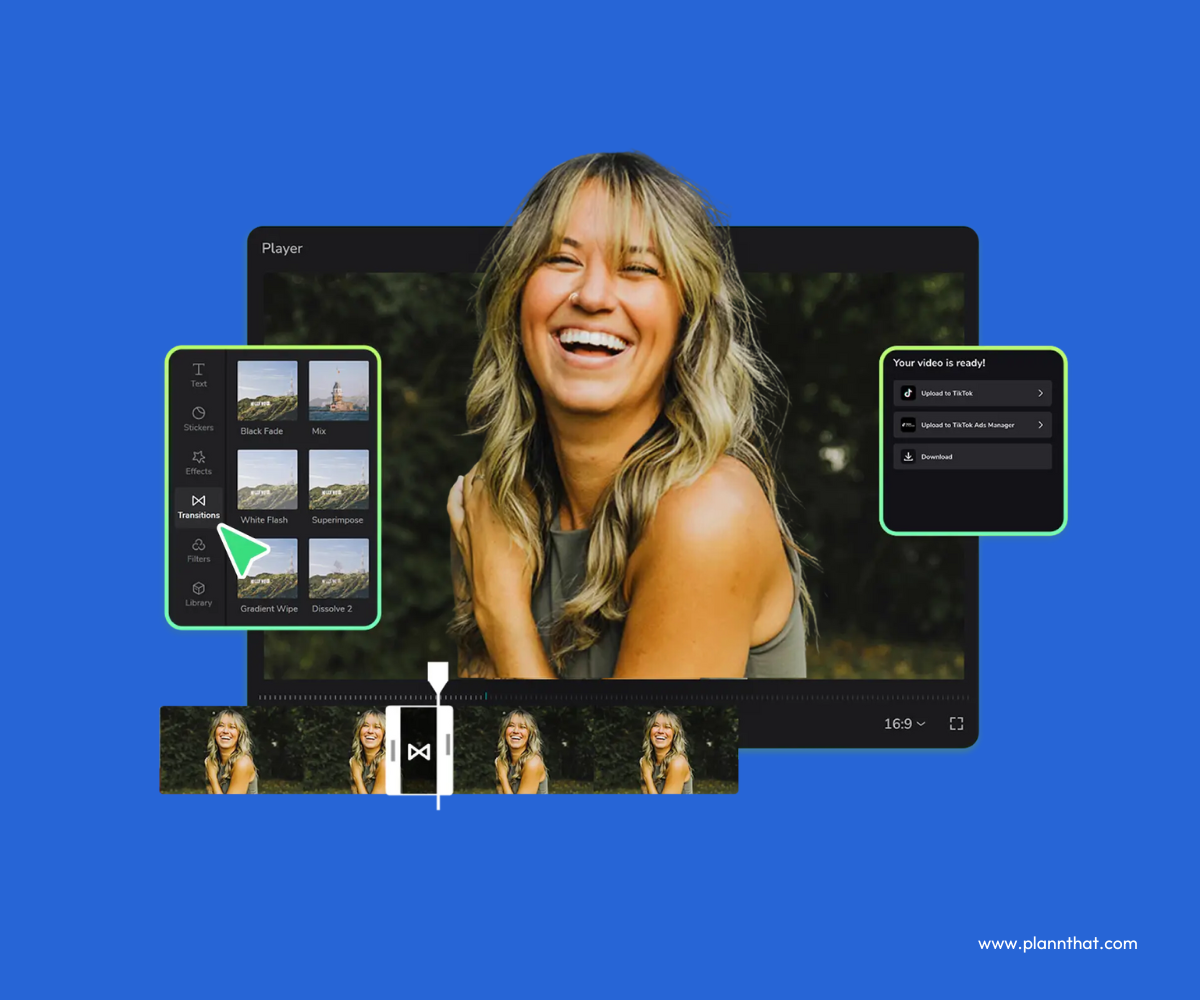
CapCut is a powerful tool for adding both simple and advanced transitions to Instagram Reels.
CapCut has become the editing software of choice for many creators because of how intuitive it is to achieve amazing results. CapCut has built-in transitions available on both its mobile app and desktop program.
The best CapCut transitions: Pull In, Pull Out, Color Glitch, Glare II, Rotate CW II.
Instagram Reels Editing Tool 2. Canva

The Canva interface shows the Dissolve transition being used to transition from a video of oranges to a close-up of a girl’s face.
There’s more to Canva than first meets the eye: it’s not only a simple graphic design software, but you can also use it to create and enhance your videos! Building eye-catching Reels in Canva takes just minutes, and while it doesn’t have all the features of a video-first platform yet, it’s becoming more advanced by the day.
The best Canva video transitions: Match & Move, Flow, Dissolve.
Instagram Reels Editing Tool 3. Instagram Reels native editor
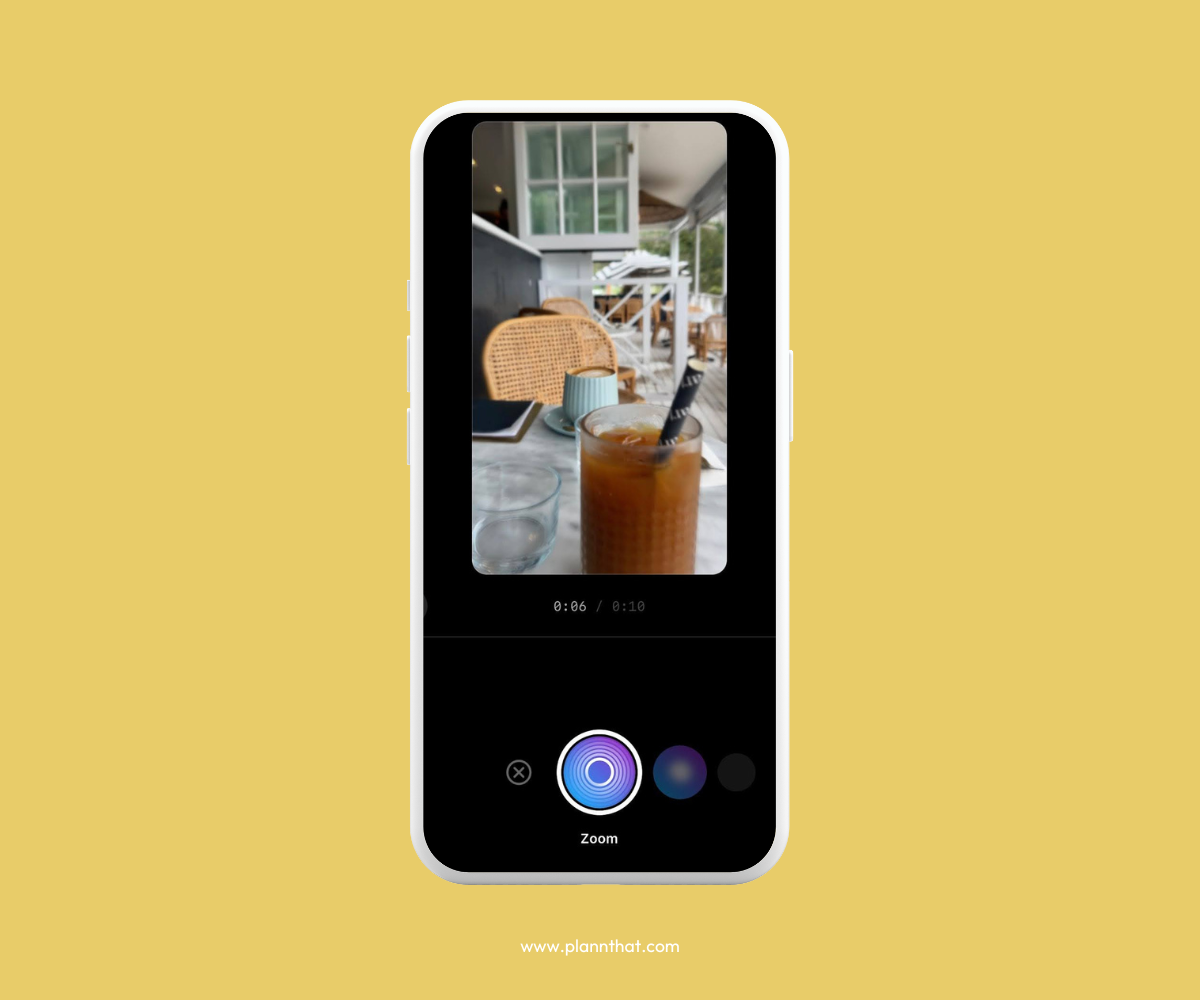
A screenshot of the Instagram Reels editor with a video of an iced coffee and the Zoom transition selected.
Sometimes, the OG does the job, and that can certainly be said for Instagram Reels’ built-in editor! Create seamless transitions between video clips by selecting from the transitions available within Instagram. While there are only a handful of options, each one is a popular and effective choice.
The best Instagram Reels transitions: Zoom, Blur, Flare, Glitch.
How to add transitions to Instagram Reels: your step-by-step guide
There are two ways creators can add transitions to Instagram Reels – through specific filming and editing techniques or by using the transitions feature within Instagram Reels itself.
The latter is an easy way to spice up your videos and keep viewers engaged, even if you aren’t a master social media marketer.
Learn how to add transitions to Instagram Reels in the app’s native editor with just a few easy steps!
How to add transitions to Instagram Reels
1. Start by launching your Instagram app and navigating to your profile.
2. Tap the plus sign at the top right to open the ‘Create’ dialog box.
3. Select ‘Reel’ to open the Reels editor.
4. Choose which videos you’d like to import from your camera roll, then tap ‘next’ when complete.
5. Once your footage has been imported, tap on the ‘Edit video’ option at the bottom left.
6. To add a transition, tap the divider between two videos. The text ‘choose transition’ will appear.
7. To cycle through your transition options and choose one, swipe to the right. You’ll see options including Zoom, Blur, Warp, and more.
8. Once you’re happy with the transition you’ve chosen, resume video editing as normal!
Troubleshooting guide: Why are Instagram Reels transitions not showing?
Some creators have reported issues with Instagram Reels transitions not showing up in the app, which is disconcerting if you’ve got important videos to edit!
Before you panic, try these quick fixes to resolve the problem.
- Follow our instructions to access transitions: Instagram is always tinkering with its features, including how and where they are accessed. Previously, the transitions feature in the Instagram Reels editor was more prominent, but now, you have to click the pill-shaped divider between videos to access it.
- Update your Instagram app: Still can’t see Instagram Reels transitions? A quick reboot and update of your IG app can force refresh the features available to you. We recommend deleting the app and re-downloading the latest version.
- Find stable wifi: Editing videos can be wifi-intensive, especially if you’re playing around with high-definition files. Find a strong and stable wifi connection, then see if the transitions feature reappears.
- Give it time: Like most apps, glitches are common on Instagram – but the team behind this beloved social media platform are usually pretty quick to fix ‘em. If you’ve tried all the above options and are still struggling to see Instagram Reels transitions in the in-app editor, sit back until the next update arrives.
5 Instagram Reels transitions to try
Instagram’s built-in Reels transitions are awesome for new creators, but once you’ve got some experience under your belt, we recommend giving filming transitions a try!
To give you some inspiration and help you navigate the process of filming your first video transition, we’ve put together a step-by-step guide to jumping on five popular Instagram Reels transition trends.
Transition Idea 1: Zoom in, zoom out
The ‘zoom in, zoom out’ transition lets you switch between scenes seamlessly and quickly. It’s a popular transition used by lifestyle and beauty influencers for before and after transformations, but it also lends itself to any kind of ‘glow up’, be it your room’s interior design or a new version of a product.
@looooooooch Smoothest transition ever orrrrrr🤭😏#Inverted ♬ original sound
To recreate this transition, follow these steps:
1. Film your first clip, ending the video with an extreme close-up of your subject, whether that’s an item, a person, or yourself. You’ll need to hold the phone in your hand to film this content, rather than using a tripod.
2. Change the scene – switch up your product, do your makeup, style the room, etc.
3. Film your second clip, starting from that ultra-close-up view and zooming out.
4. Stitch the videos together so the first clip ends at the zoomed-in point and the second clip starts this way.
5. Clean up any bits and pieces, and you’re ready to hit ‘publish’!
Transition Idea 2: Swipe to switch
Get creative and bring your next Instagram Reel to life with the swipe to switch transition. This transition works for practically any content niche, but it lends itself particularly well to a video that has you in it!
View this post on Instagram
Follow along with our step-by-step guide:
1. Begin filming your clip within Instagram Reels or using your phone camera.
2. At the end of the clip, include a swiping motion (such as a flick of your hand or a turn of your head) and swing the camera away from you at the same time.
3. If you’re not filming a face-to-camera video, you can create the swipe by simply moving the camera away from the subject.
4. For your next clip, pan the camera toward you this time: the opposite way to the first clip.
5. Stitch your videos together, trim them to your liking, and show off your masterpiece!
Transition Idea 3: The jumping cut
The jumping cut transition takes the term ‘jump cut’ literally, switching between scenes as the subject jumps! It’s a fun way to transition between outfits or highlight different products. Best of all, it’s super easy to create.
@soph_fitxx Which colour is your favourite 🙈@womensbest #clothtransition #viral #foryou #transition #jumptransition #ukviral ♬ Monster – LUM!X & Gabry Ponte
Here’s a step-by-step guide to creating a jump transition within the Instagram Reels editor:
1. Set your phone up on a tripod or any stable surface you have.
2. Choose your favorite song on Reels in the top left corner.
3. Set a timer and slide along the bar to choose where you want the transition effect to be (hot tip: when the beat switches in the song, that’s where you want the transition to occur).
4. Start your timer, get into place and jump when the beat changes.
5. Hit the timer button and select your clip duration again.
6. Use the align tool to make sure you’re in the same position as the last frame of your first clip.
7. Record yourself jumping again and trim out any last flaws from your video.
Transition Idea 4: Shoulder swap
Great for showing off different outfits or switching between subjects, the shoulder swap is a trending Reels and TikTok transition that any creator can try to give their content some flair.
View this post on Instagram
Create the shoulder swap transition using these steps:
1. Start by filming around the first person’s shoulder in one direction.
2. Film a second clip around the other person’s shoulder (or the same person in a different outfit) in the same direction. This is critical!
3. Edit the videos together in your program of choice, trimming the first clip and second clip so they align at the right place and make a full circle. You could also add a speed ramp if you are an experienced video editor.
4. Add music, text, and any finishing touches before you upload your file to Instagram Reels!
Transition Idea 5: Phone shake
A DIY version of the glitch transition you may have seen in various editing apps, the phone shake will keep viewers engaged and give you an easy way to transition between scenes. This is another great transition to use for all types of content, particularly POV and face-to-camera shots.
View this post on Instagram
Give the phone shake a go by using these steps:
1. Film your first clip, and at the end of the video, shake your phone gently.
2. Film your second clip, this time starting with a phone shake.
3. Stitch them together at the shaking point.
4. For best results, use 0.5 on your back camera!
5. Make any last edits, add music and text, and upload to Instagram.
Ready to supercharge your success on social media?
Looking for an all-in-one content creation suite that allows you to manage your social media channels effortlessly? From mapping out your strategy and designing your graphics to saving plug-and-play hashtag sets, you’ll find everything you need inside Plann.
Go on, redeem your 7-day free trial of Plann Plus. If you don’t like it, keep using Plann for free!
